There are some places online where photos are pretty much doomed, most of those places being social networking sites. Myspace will resize photos, and facebook is even worse - photos that looked fine on your computer will appear desaturated, pixelated, and just generally crappy once they're uploaded to a facebook gallery.
The most annoying thing though is when sites that are SUPPOSED to be for showing photos, seem to mess them up as well. To keep your photos looking great, make sure you are resizing them properly, using a moderate amount of sharpening if needed, and converting them to the correct color profile.
In Photoshop when you resize an image (Image > Image Size or ctrl+alt+I on a pc) you will be presented with a dialogue box. At the bottom of the box you'll see a small drop down menu with several options; most of the time this is set to "Bicubic Smoother (Best for Enlargements)" but since we aren't enlarging we want to choose a different setting. Click the menu and choose "Bicubic Sharper (Best for Reductions)".
When making an image smaller, it tends to get softer and lose it's crispness, so this helps preserve some of that.
Even using Bicubic Sharper you may still need to sharpen your image more. Duplicate the image, and on the top layer use Filter > Sharpen > Smart Sharpen or Unsharp Mask. I prefer Smart Sharpen most of the time because to me, Unsharp mask just brings out black edges too much and I don't like the look; you might like Unsharp mask the best, it's really personal preference or what your client wants.
After you apply your filter, you can adjust the opacity of your top layer to achieve the amount of sharpness you want. You can also use masks on the top layer to control which areas get sharpened (when I retouch portraits, I mask out the sharpness on skin, so that just the eyes and hair gets sharpened).
Now you're ready to convert to the correct color profile for the web. Go to Edit > Convert to Profile and choose sRGB as your destination space. This will keep your colors retained on your image, so that they won't get all wacky once you upload them.
Now you're ready to save as a high quality .jpg and upload to the web!
Monday, March 23, 2009
Friday, March 20, 2009
Tip: Portfolios Sizes
A lot of photographers and models only ever share photos digitally, online, through websites or email. But for those looking to create an actual hard copy portfolio you may find yourselves wondering what size your photos should be printed at.
When preparing files for printing you should size them to a resolution of 300dpi - you should also make sure you save to the right color profile for the lab that is doing your printing. The place I get prints from, exposuremanager.com, asks for jpg files in SRGB colorspace.
For performers (actors, actresses) the standard size is an 8x10 inch print in portrait orientation.
For models, 9x12 - show up to a casting with an 8x10 book and you'll look a bit silly!
And for photographers, it is 11x14 - a hefty book, but it's meant to be big so that the client can see all the details in your photos.
For photographers, these sizes all mean you need to crop your images down - so try to plan for that while shooting and give yourself room so you don't cut off a forehead.
Sunday, March 15, 2009
Tip of the Day: Concerts
Since my boyfriend Dylan regularly puts on shows here at USM I find myself a lot of times tagging along with my camera. I went from never shooting concerts to feeling pretty confident doing so, so I wanted to share a small tip I've learned from the past year.
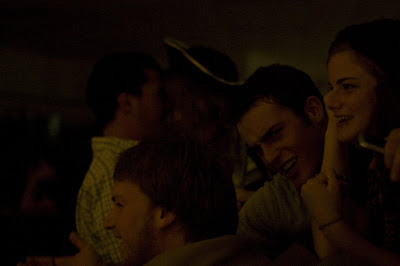
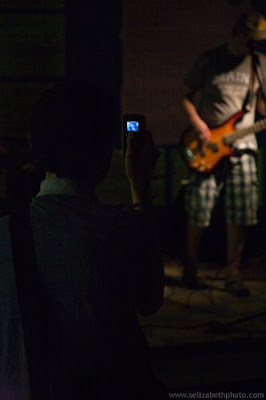


Don't forget about the audience! I've gotten some really nice shots from turning around and ignoring the band for a few minutes to get some shots of the crowd. Whether it's people at the show interacting with each other or catching another photographer mid-shot, you can get some really nice photos if you switch your area of focus for awhile.
Labels:
better photos,
concert,
how-to,
photography
Saturday, March 14, 2009
retake!
Sometimes when I learn a new post-processing technique I like to go back to previous works and redo them.
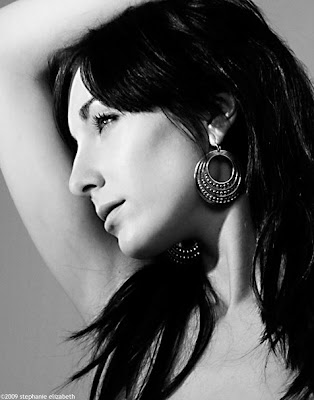
emily
http://www.modelmayhem.com/1047156
Basically if you ever are converting to black and white - PLEASE don't just hit "desaturate"! It may look fine but it most likely can be made better by using the channel mixer or making a few layers with different contrasts. The image above was converted to black and white by making a low contrast layer on top of a high contrast layer and changing the blending modes and opacity till I reached what I wanted. Experimentation is key :)
Taking my pentax and a few rolls of film to Boston tomorrow :D Can't wait to share the results!
Taking my pentax and a few rolls of film to Boston tomorrow :D Can't wait to share the results!
Labels:
black and white conversion,
emily,
fashion,
how-to,
tutorial
Subscribe to:
Comments (Atom)


