Tuesday, July 20, 2010

A Wedding

I had the honor of doing the photography for my very good friend's wedding. Here are a few of my favorites from the day.


Saturday, June 5, 2010

it's hard

to create things when you feel defeated. but, here are a few from this Christmas. I haven't abandoned photography completely.


Sunday, October 25, 2009

What (Not) To Do With Your Camera

Christmas-time means a slew of shiny new cameras in the hands of consumers everywhere. At this point in the year, the end of October, I had hoped a lot of those budding shutterbugs would have gotten a firmer grasp on how to handle their new weapons... but alas, I'm still seeing some basic mistakes in technique that people make that is stopping them from getting the most out of their cameras.

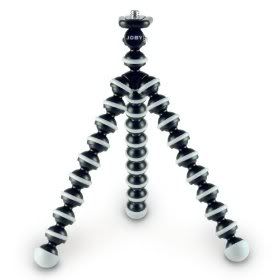
1) The camera is not a dirty dishrag. You don't need to hold it arms length away from you. This is not a middle school dance with your camera as your date. I had someone once come to me complaining that they just couldn't get the same sharp images with their point and shot that I was getting with my DSLR. I had them take a few photos so I could see how they went about it, and I found they were holding the camera way out in front of them. Now part of this I think is because of the design of a lot of new digital cameras that have live LCD viwers on the back instead of optical view finders (i.e. looking through an actual hole in the camera like you had to before digital came along). But I would highly, HIGHLY suggest to hold tight onto the camera. Place your feet shoulders width apart and hug the camera as tight to your chest as you can to take as steady a shot as you can. Another option to increase stability are mini tripods - Gorilla Pods are one brand I know of that are for use with light weight P&S camera's, the idea behind them being that the legs can wrap around surfaces like fences or trees to open up more photo possibility without needing a full size tripod.
Other variations I see on this are people standing holding the camera with just one hand... use both to be more stable.


For the record I have not used one of these, but I would NOT recommend using it with anything heavier than a point and shoot.

2) Forgo flash, embrace natural light. Today I went to a beautiful park, Fort Williams, and saw a young woman with an entry level DSLR taking photos of the lovely beach scene in front of us. Nothing wrong with that... till I noticed that her on-camera flash was popped up and firing. There are some instances where flash is inevitable, 
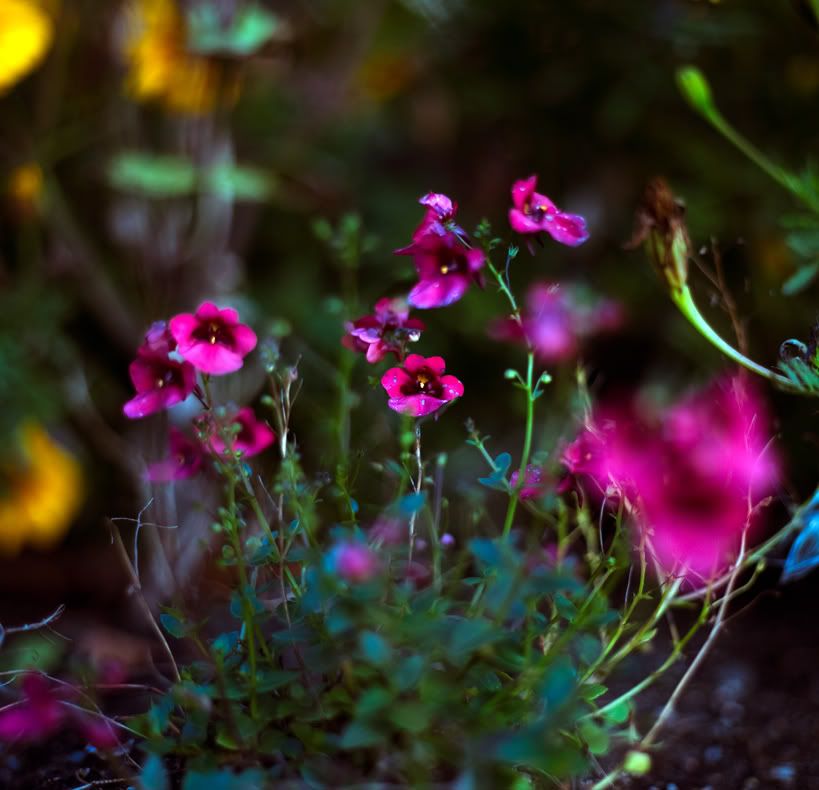
but don't waste your batteries using the flash on landscapes. You should also turn it off if you are in a large auditorium and far away from the stage, because the light simply won't travel far enough to illuminate what you want; in fact the flash firing can trick your camera into using a FASTER shutter speed which in turn may make your image darker than you wanted. You'll also find your photos to be more pleasing to the eye when they are using ambient (natural/available) light versus the camera's flash.

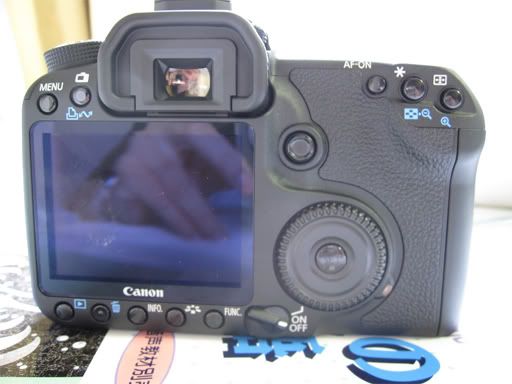
3) Auto Mode. If you have a DSLR there is zero excuse to shoot in auto mode unless you are shooting something like sports and you haven't had a lot of experience and NEED to nail the shots. But if you can control your shutter speed, aperture and ISO - do it. This might be the biggest issue I see with photographers images... a simple lack of control. I was intimidated for a long time with the controls of my camera till I really forced myself to learn them, and now I can't imagine shooting in Auto Mode. camerapedia.org is a great resource for information on cameras, including explanations of shutter speed, aperture and ISO. I would be unable to shoot the majority of images that I now shoot if I were still using Auto settings.


Photograph from CLF on flickr creative commons

4) Distracting your viewer with large watermarks or borders. There are some photos that look great with a border and some watermarks that are artistic and lovely. But I see so many photos overtaken with giant, thick black borders that just aren't necessary and really detract from the image as a whole. In a real life situation I love seeing photos with matted borders, but online where images are already getting squished small enough to fit my screen comfortably, I don't want to see them made even smaller because a border is taking up 1/3 of the area.


But really if there is one thing to do, get off auto mode. You'll be amazed at the results!

Next up I'm hoping to do a side-by-side comparison of aperture settings to better demonstrate what the heck they are. I figure I yell enough about setting everything manually I might as well explain the settings a bit more ;)

Friday, October 23, 2009

Macro Flowers & Plants

I've taken the past several months "off" from taking photos of people. I was getting burned out at the end of last spring and it just wasn't fun. So I took the summer to relax and just shoot whenever I felt like it and focus more on landscapes/nature versus people (because trees don't flake out and flowers don't get tired of waiting around for the right light ;)

I've felt a lot of growth in my work, especially in that I can really control what I want the final output to be right from the start. At the beginning of 2008 I can remember telling my boyfriend (now fiance) Dylan how frustrated I was that I would see beautiful things but couldn't quite capture them properly with my camera. Every time I clicked the shutter it was a bit of a crap-shoot as to what would come out, and everything was always taken using auto settings. But I realized this past week that I've jumped that hurdle without even knowing.


And beyond just learning the technical aspects like how to set my aperature to a larger number to get more in focus, or a smaller number to get less in focus, I've developed a style of my own.

hint: if you can't tell, I go for shallow depths of field using small f/stops (usually 1.8) for my nature work, and I'm starting to explore long exposure landscapes.


I've slowed down a lot taking photos - I no longer see things and go nuts clicking the shutter. I look at a subject, and think about the light - where is the sun, are their clouds, how bright is it - and what's around, behind and in front of it.


I've gone from knowing shit about composition to learning the rules and now finding myself using them and at times intentionally bending them. No longer am I terrified at the thought of large areas of "blank" space in my photos.


When I started out I really didn't think I'd reach the point I'm at, and I didn't think I'd find this entire genre so interesting and so fulfilling.


I'm really proud of the body of work I'm putting together, and I hope everyone viewing my photos enjoys them as well!


More photos + prints available at natureofmaine.com

Tuesday, October 20, 2009

South Portland High School Marching Band

Sorry for the delay, but here are the photos I took at the Biddeford show a few weeks ago.

If you yank any and use them on facebook PLEASE link back to this blog. Thanks! :)


Lately in my photographs I've been trying to use the foreground more to add interest, information or a nice frame to the subject.


I'm also working on not cropping out hands or feet, which is difficult when the subject is moving around and you can't direct, but I've found it's not impossible as long as I stay aware of the edges of my frame.


My professor has hounded us a lot about not getting stuck at eye level taking photos, so this is my effort to tilt my camera more ;)


I got a few crowd shots, but to be honest - the crowd sucked! There's even a photo from the last entry with a trumpet player in the actual stands playing right into people's faces and they still look super serious about the whole thing.


Fin!

My plan for the next blog is to show some new color work and a few things I've learned about nature photography. Comments are always welcome! :)

Thursday, October 15, 2009

Photojournalism: Marching Band Show

These photos were taken at the Biddeford marching band competition. I was there primarily to see the South Portland Red Riots marching band, but I wasn't able to scan those negatives in on time to post this tonight and I wanted to share at least something. I hope to post again this weekend or next week with those photos and a few other stragglers that didn't get scanned tonight.

It was a great show!


Technical info: these were all shot with my Pentax ZX-M then scanned into a computer using a badass film scanner my school owns. I shot with a mixture of 400, 1600 and 3200 speed films. The 3200 came out surprisingly clean since the shop I bought it from warned me the grain would be "the size of gravel". I must caution though that the development time for that film was a staggering TWENTY MINUTES. Ugh. Never again!!!


I saw this man with his big ol' 300mm Canon lens and just had to get a snap. He looks like the quintessential sports photographer, right down to the backwards ball cap :D


This judge sat down in front of me creating the perfect shot - look at that poor kids face!


I spotted this guy when he was in the stands across the gym from me trying to get photos (all the performers were facing away from him, so he eventually moved over pretty close to me and blocked a few shots, leading me to snap a few of him ;)


Monday, September 21, 2009

long exposure photography

The vast majority of the time I am shooting hand held and so try to keep a shutter speed of at least 1/125 to prevent blurring from camera shake. I recently have come into possession of a loaner Manfrotto tripod from my school that's enough of a beast to wield my Canon 5D on, and am excited to share my first dive into long exposures since, well, I don't know how long!


The above is a photo of Megunticook Lake in Camden, ME. It was taken after sunset when there was still a little bit of light left coming over the horizon. Settings: 30/1, f/22, ISO 50

I used my 28-135mm lens to take this photo for two reasons - I wanted the widest possible focal length, and 28mm is the lowest of all my lenses. I also wanted to be able to use my circular polarizing filter in order to properly expose both the sky and the lake as well as allowing me to slow the shutter as much as possible since the polarizing cuts down on the amount of light getting through to the camera's sensor.

I went out last night to try some more photos along the lines of that one, however it was a bust - none of the came out remotely as interesting. I've got my hopes up for next time though, and plenty of ideas for locations to shoot, so stay tuned for more!